Operator line: status, settings and call distribution
Last updated: 27 October 2026 · 6 min read
Every “Calls (Clomni Voice)” inbox has an “Operator line” section in its settings. Here you see whether the line works, copy what your operator needs and change the line's settings. Administrators see this section.
Steps
-
1
Open the section
On Settings › Workspace settings › Inboxes, find the Voice inbox and open its settings. In the side menu, click “Operator line”.
-
2
The line's status
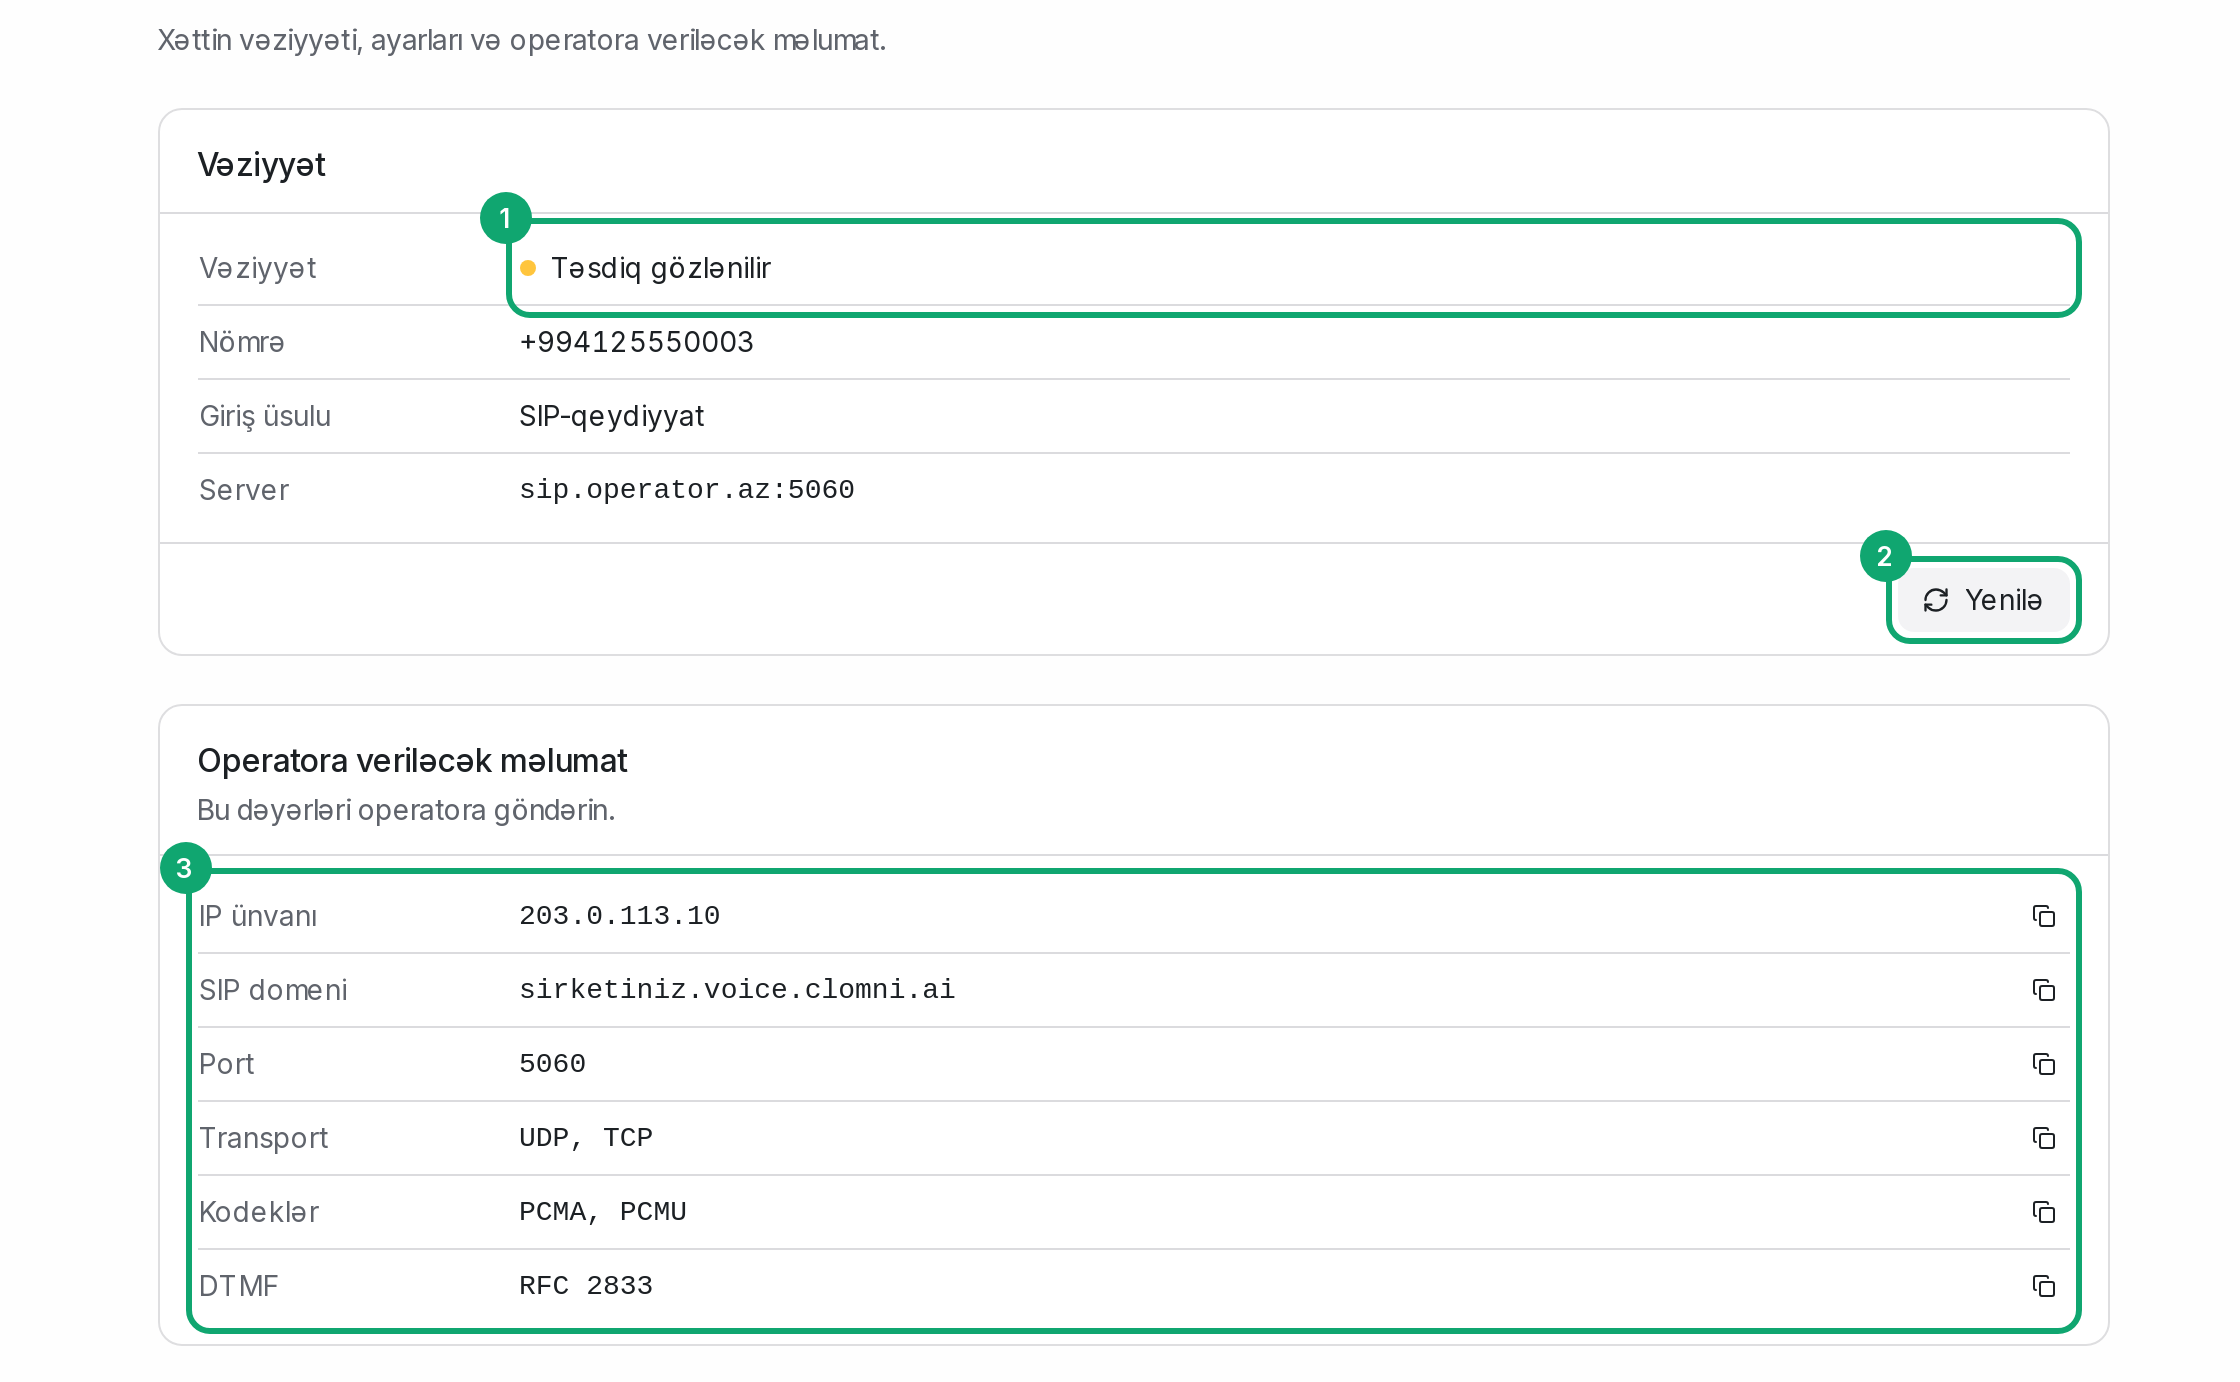
The “Status” card shows the line's status, “Number”, “Sign-in method” and “Server”. On a SIP registration line:
- “Registered”: the line is connected to your operator and calls come in.
- “Error”: your operator does not accept the line. Their answer is written below. Check the server, login and password with your operator.
- “Waiting for approval”: the line is not approved on the Voice side yet; it registers once approved. If it takes long, contact the Clomni team.
- “Checking”: the status is not known yet.
On an IP line, the status is “Approved”, “Waiting for approval” or “Error”. An IP line is approved automatically when it is created, but for calls to arrive your operator has to add our IP address to their allow list. Click “Refresh” to read the status again.
-
3
Details for your operator
This card holds “IP address”, “SIP domain”, “Port”, “Transport”, “Codecs” and “DTMF”. The button next to a row copies its value and “Copied” appears. Send these values to your operator.
-
4
Change the line's settings
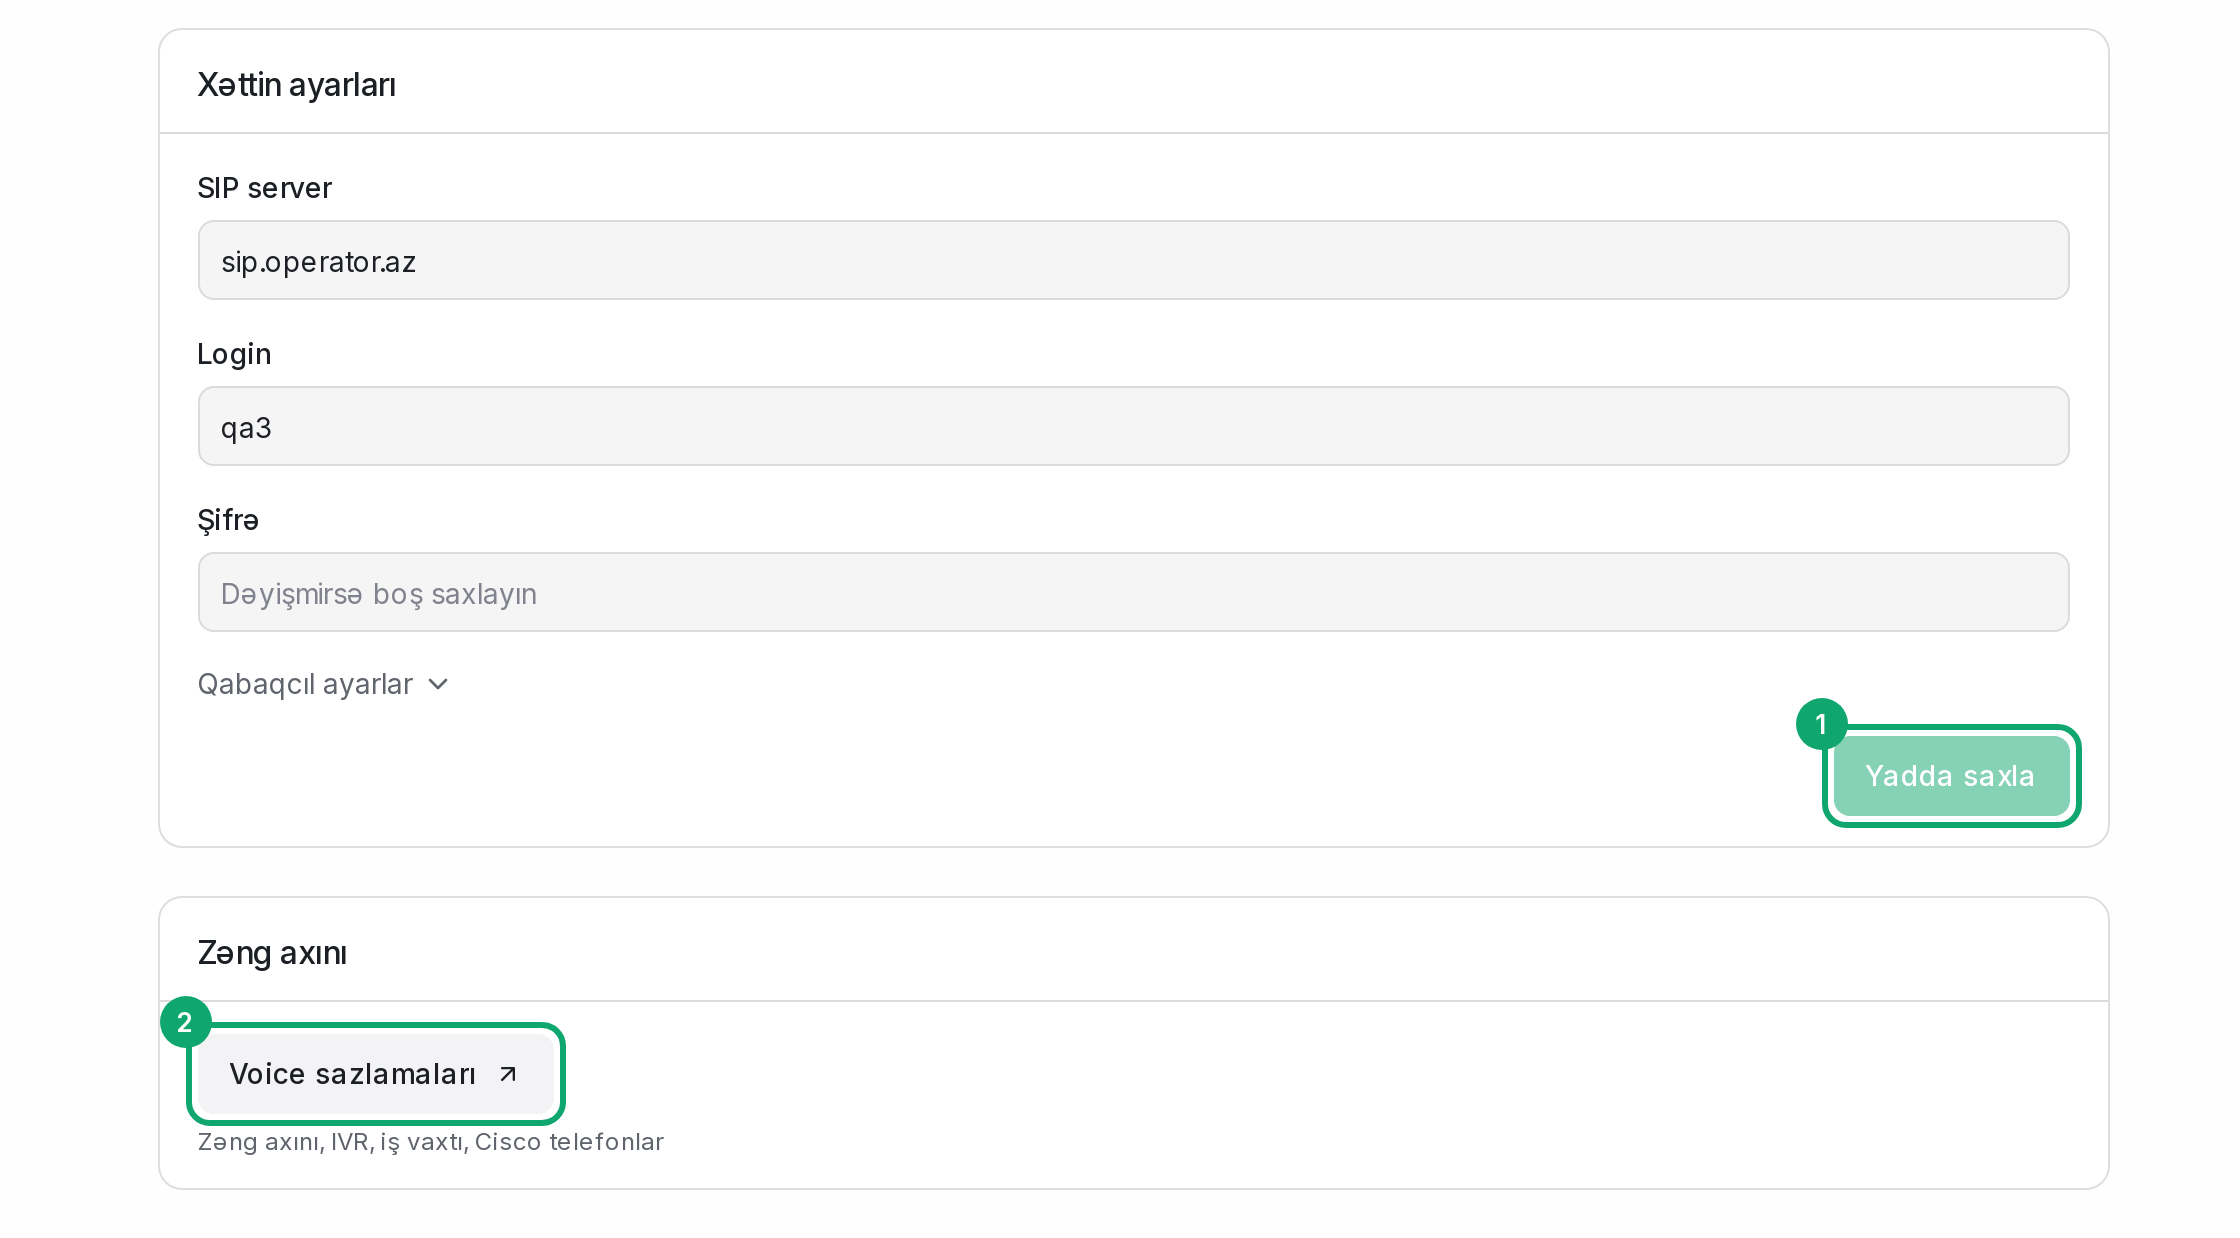
In the “Line settings” card you can change the server, login, password and “Advanced settings” (port, transport, codecs). If you are not changing the password, leave the field empty: the old one is kept. Then click “Save”; “Line updated.” appears. The sign-in method (SIP registration or by IP) cannot be changed: if you need the other one, create a new inbox.
-
5
Voice settings
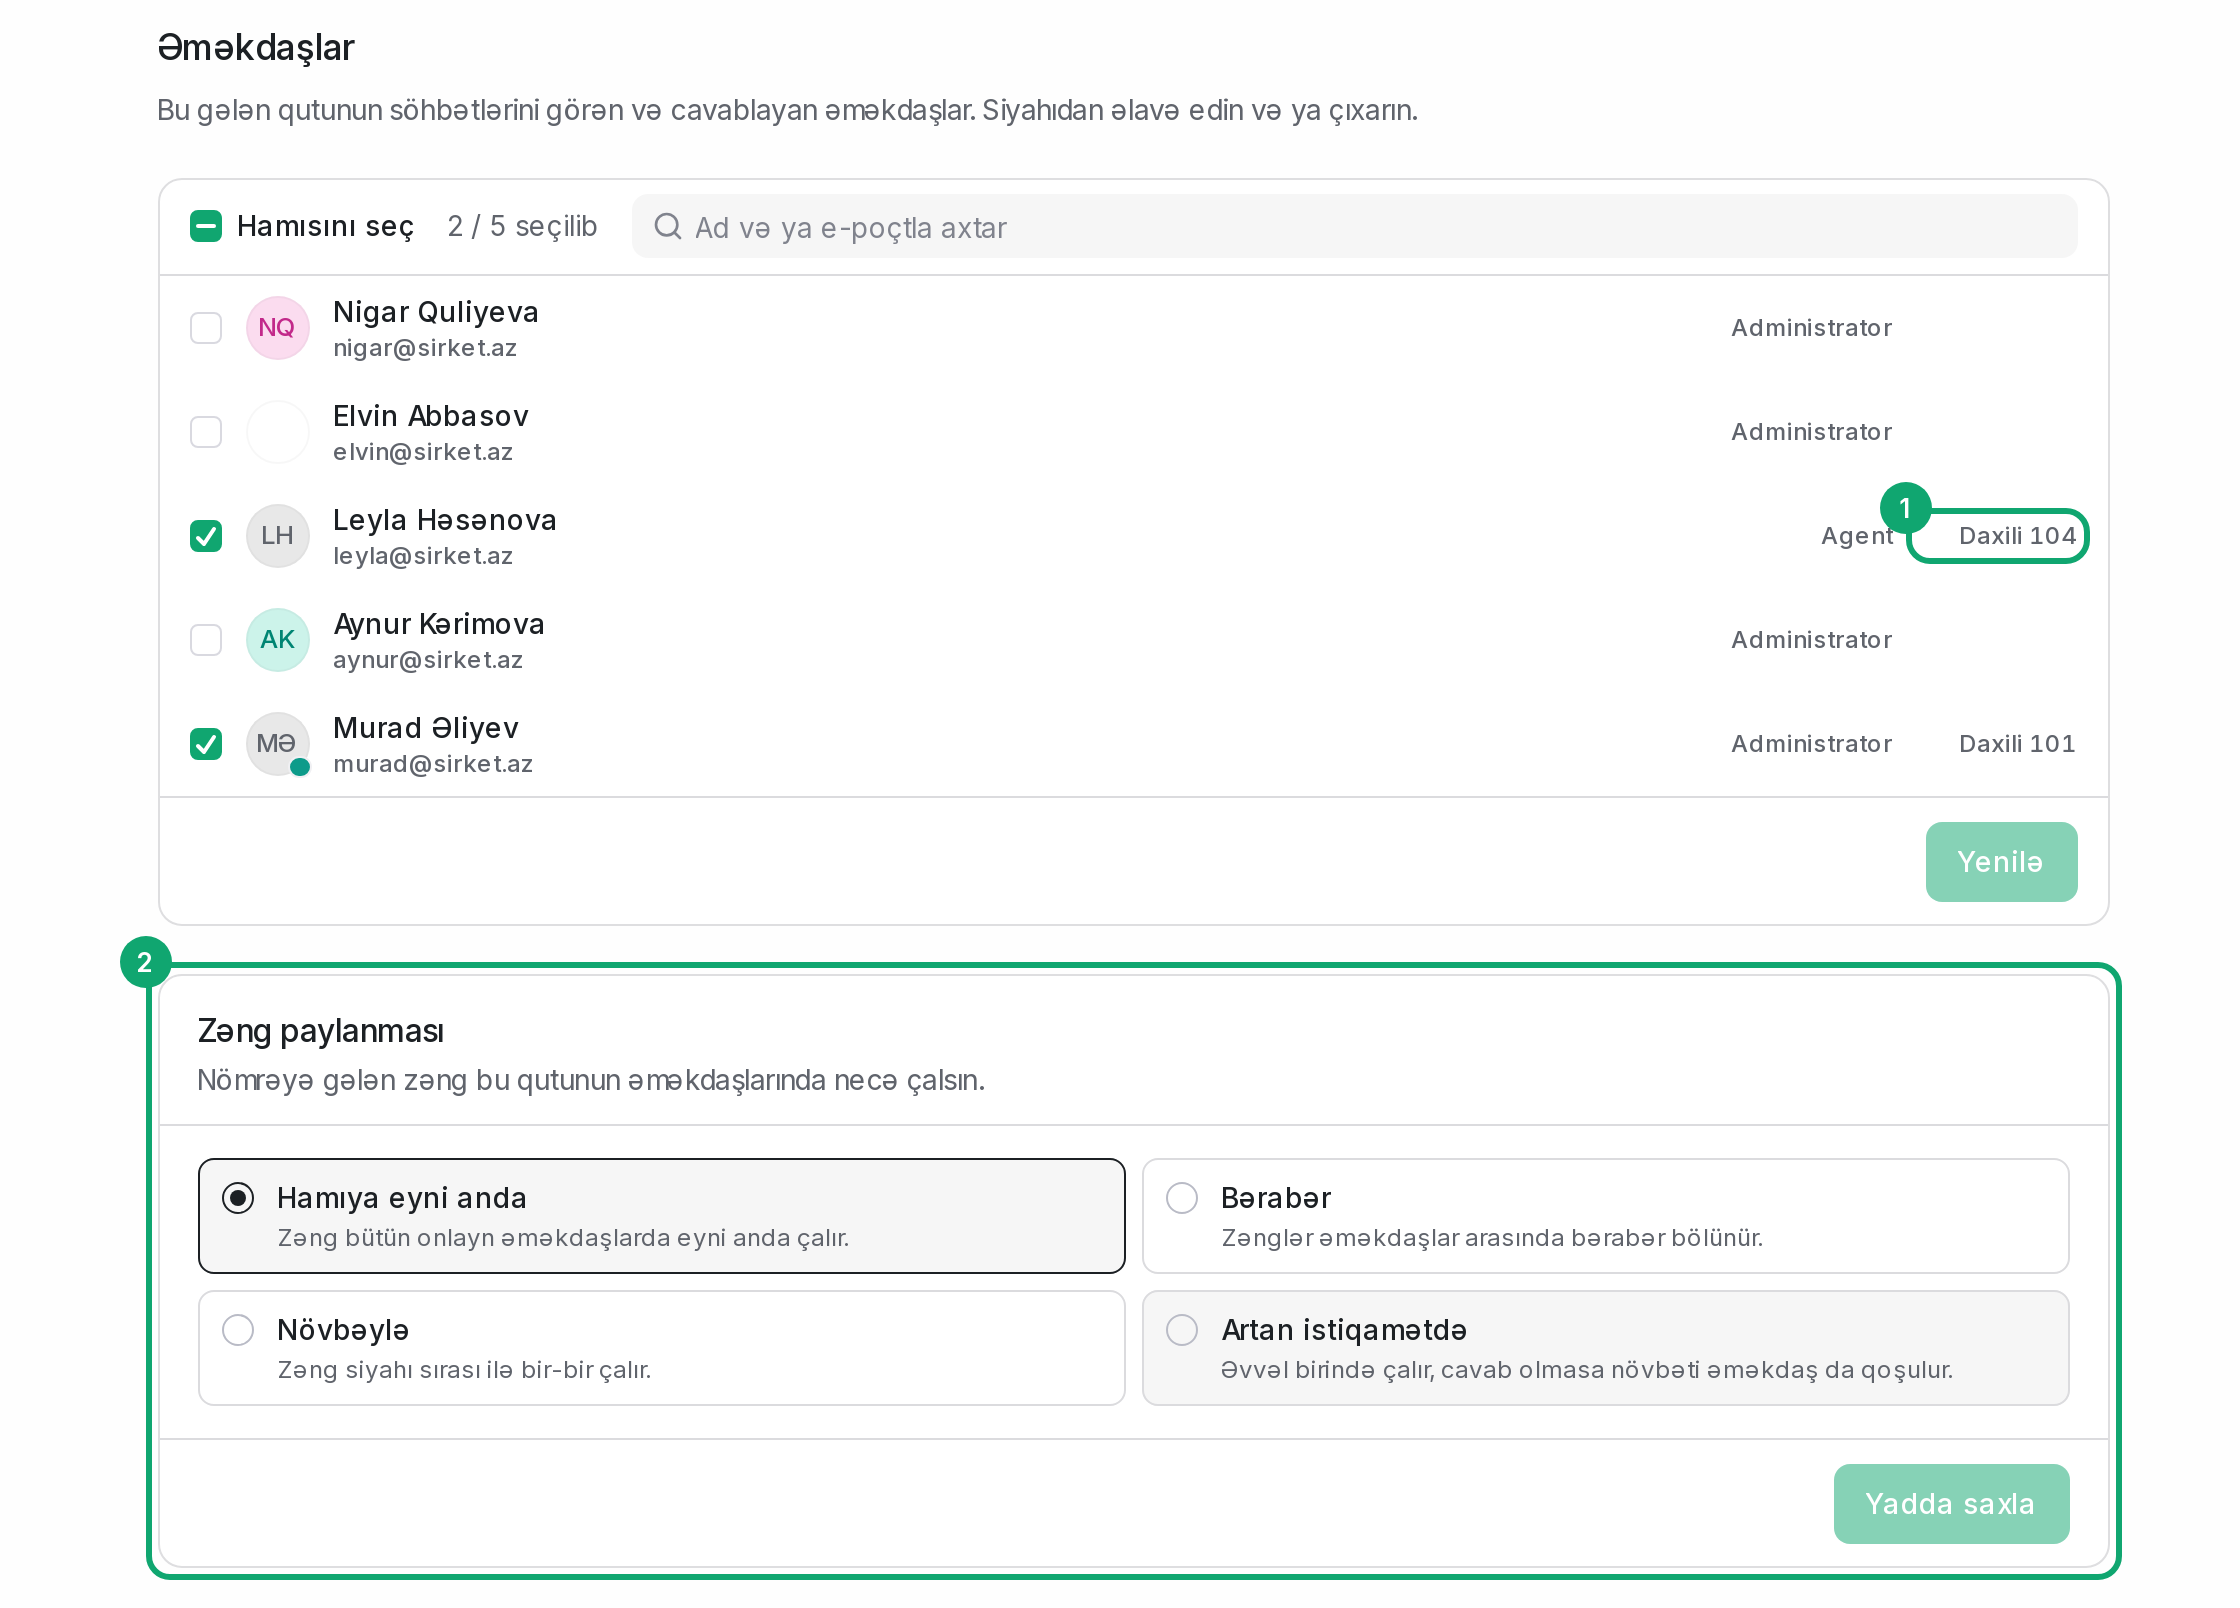
The “Voice settings” button in the “Call flow” card opens the Voice panel in a new tab without asking for another password. The IVR menu, business hours, call flow and Cisco desk phones are set up there. Only administrators see the button. If the panel does not open, “Could not open the Voice panel. Try again.” appears: click the button again. More in the “Voice settings” articles.
-
6
Change the call distribution
In the inbox's “Collaborators” section, each member's extension is shown next to their name, for example “Ext. 104”. A customer's call rings only the agents in this list. In the “Call distribution” card below, choose “All at once”, “In turn”, “In order” or “Adding up” and click “Save”. The inbox of a number that already worked on Voice has no such card: its distribution is set up in “Voice settings”.